
How to program limit switch to enable motor? Programming Questions
Connect the Arduino Nano to a PC using a USB cable. Open the Arduino IDE. Install the ezButton library. Refer to the instructions at How To. Choose the appropriate board and port. Click the Upload button on the Arduino IDE to upload the code to the Arduino Nano. Press and then release the Limit Switch.

Arduino limit switch and relay lesson3 YouTube
The limit switch is basically a Single Pole Double Throw or SPDT switch. Having a common pin allows us to use it as basically two different switches! In our tutorial we're going to wire it both ways and provide two separate code examples so you can choose which way to wire the limit switch best works in your projects.

2 limit switches wiring using same pin Arduino YouTube
2 limit switches wiring using same pin Arduinovoid setup() { Serial.begin(9600); // put your setup code here, to run once: pinMode( 7 , INPUT ); pinMod.
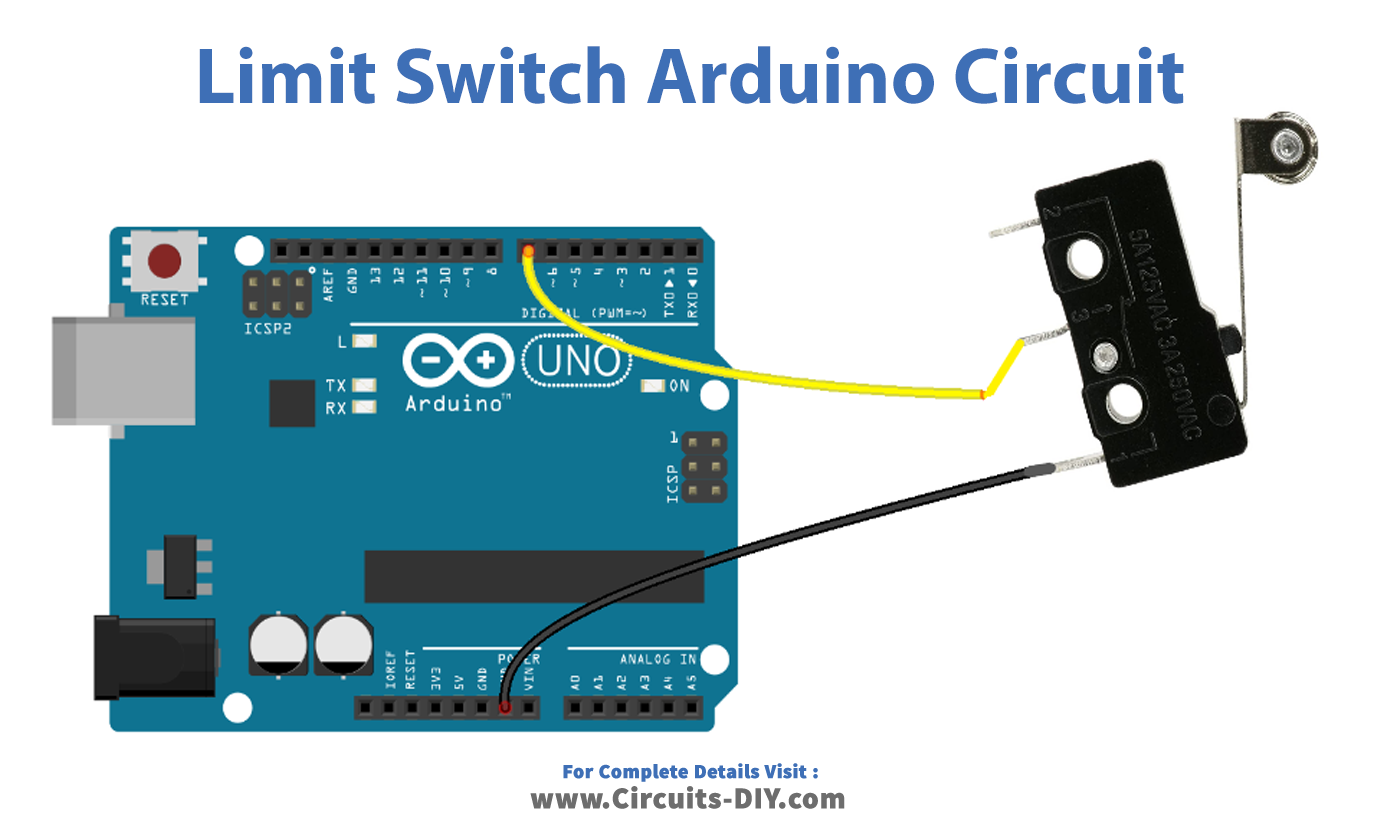
Limit Switch using Arduino UNO
A limit switch is a way of physically detecting when an axis reaches the limit of its travel and automatically stop the machine. This has a few uses: Prevent skipped steps or even damage to the frame, motors, or other parts of the machine. To enable homing on each axis. What is homing?
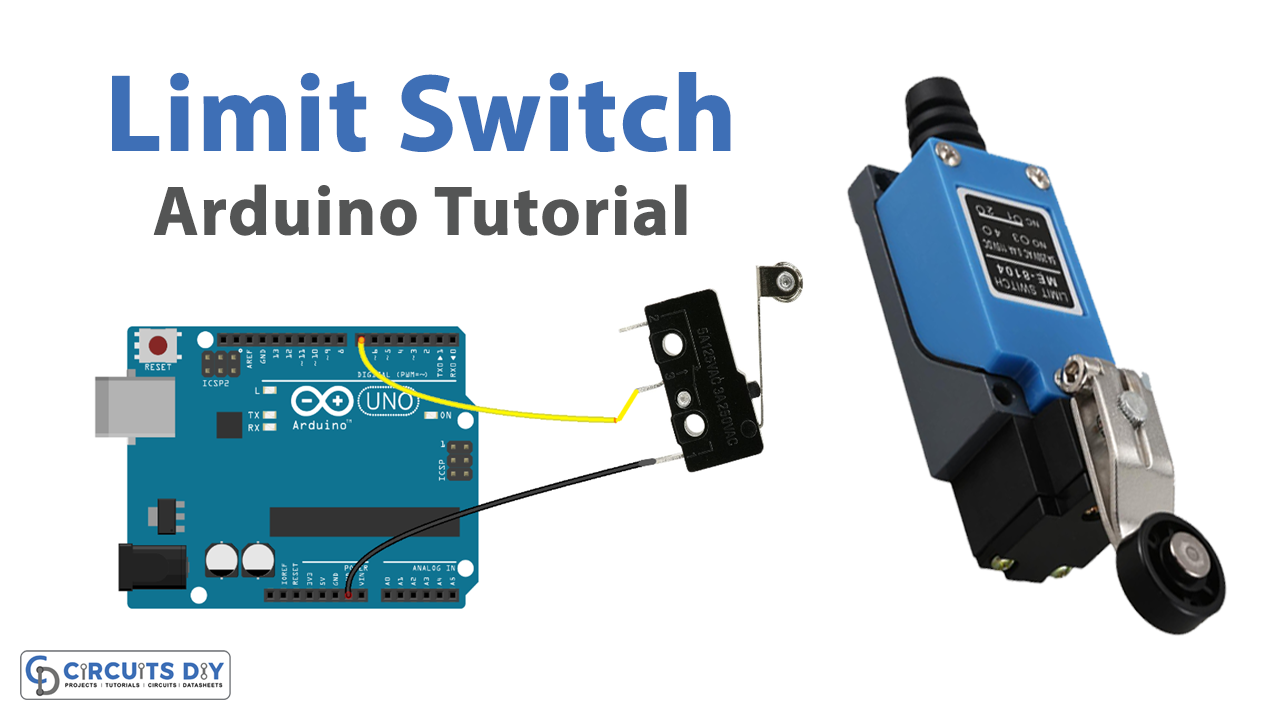
Limit Switch using Arduino UNO
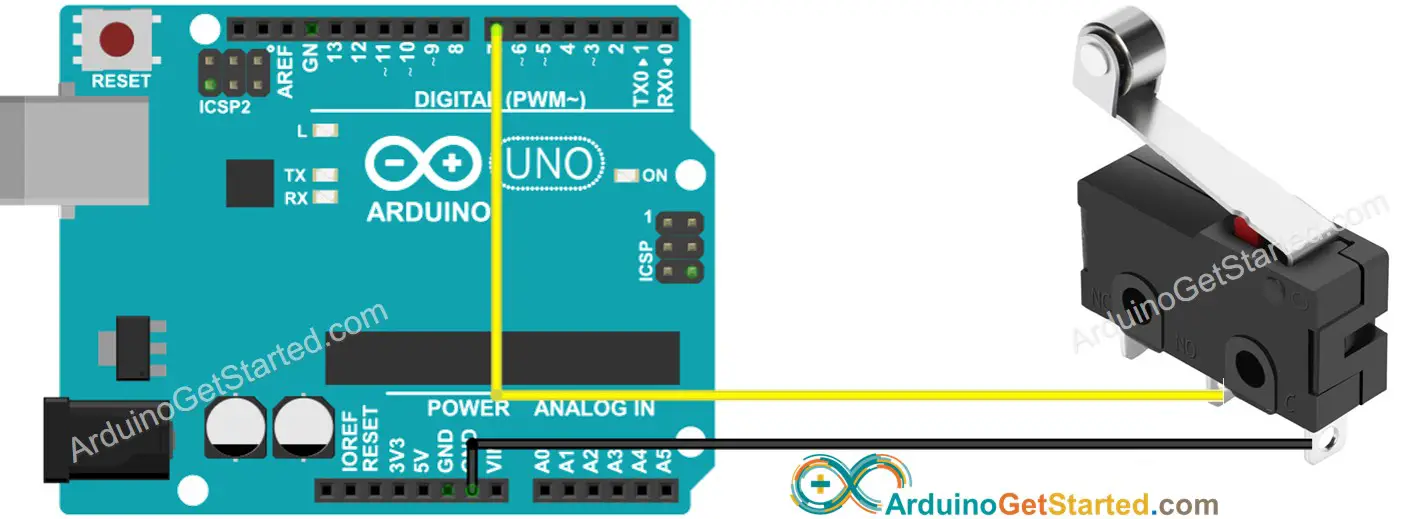
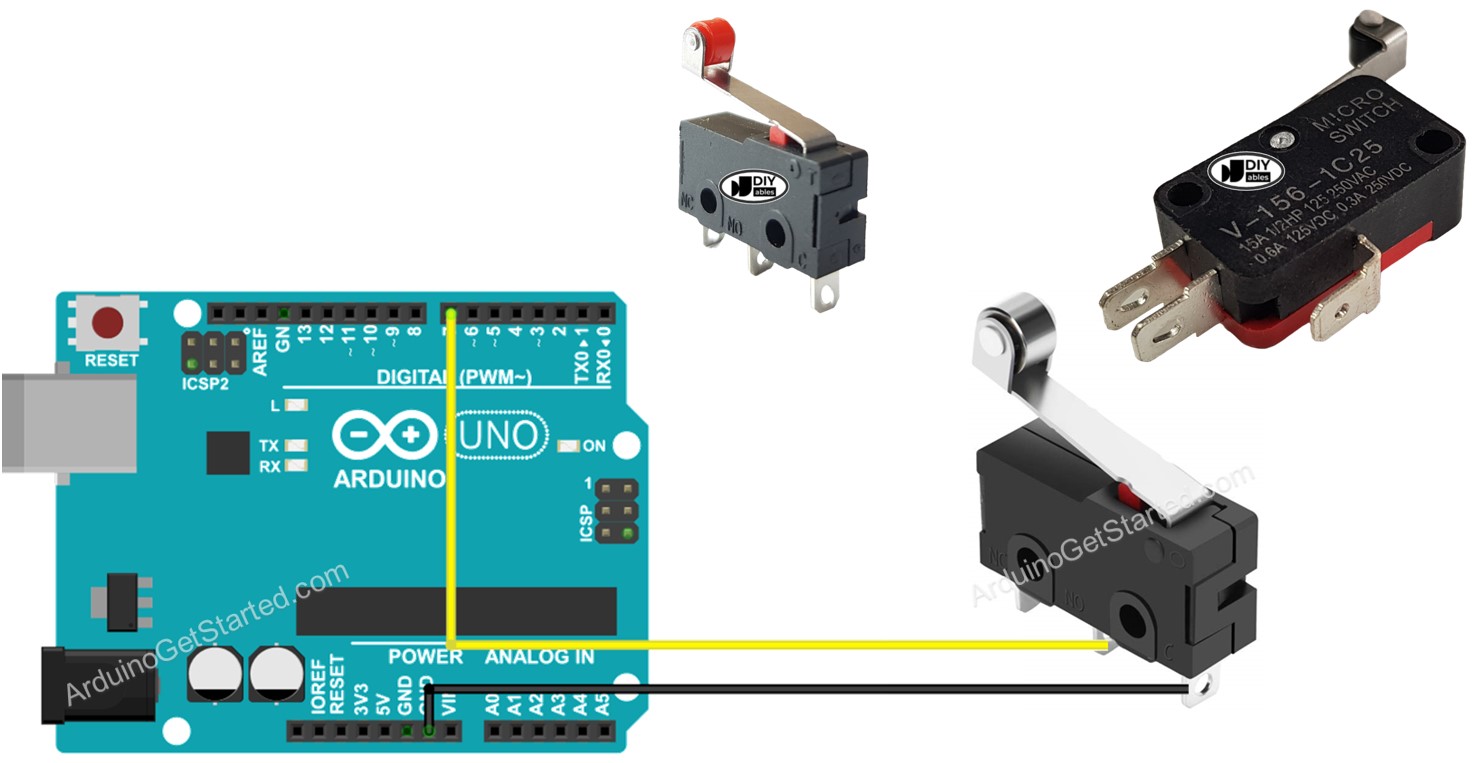
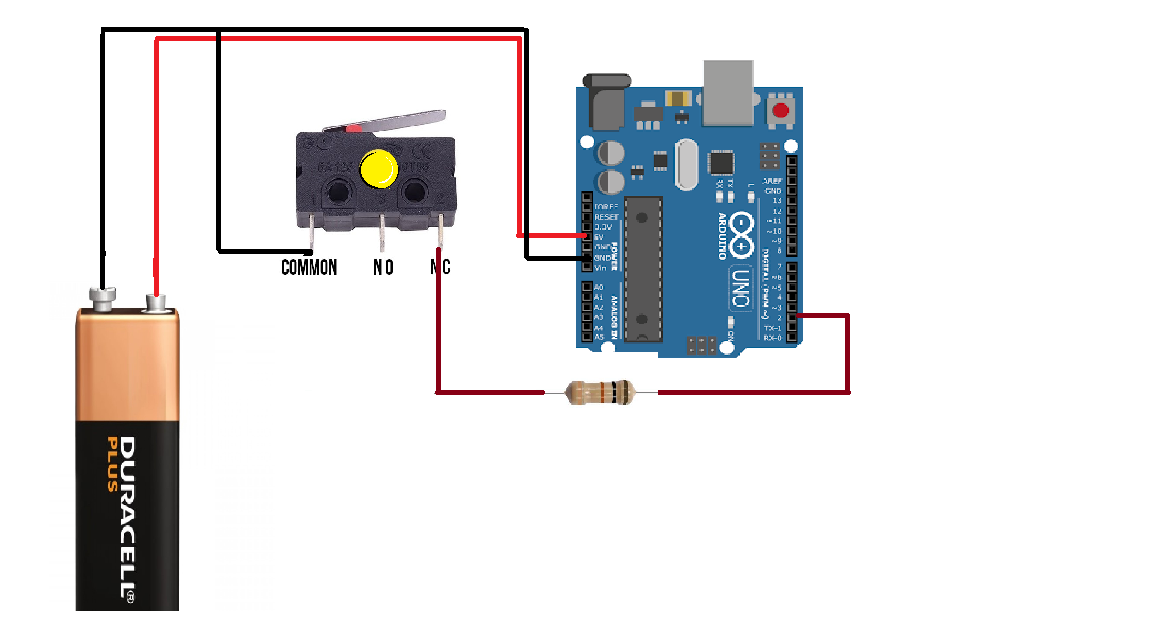
About Limit Switch It is called Limit Switch because its main functionality is used to detect the moving object reaching a limit. Pinout The Limit Switch has 3 pins: C pin: is the common pin. It is used in both normally open mode and normally closed mode NO pin: is normally open pin. It is used in the normally open mode
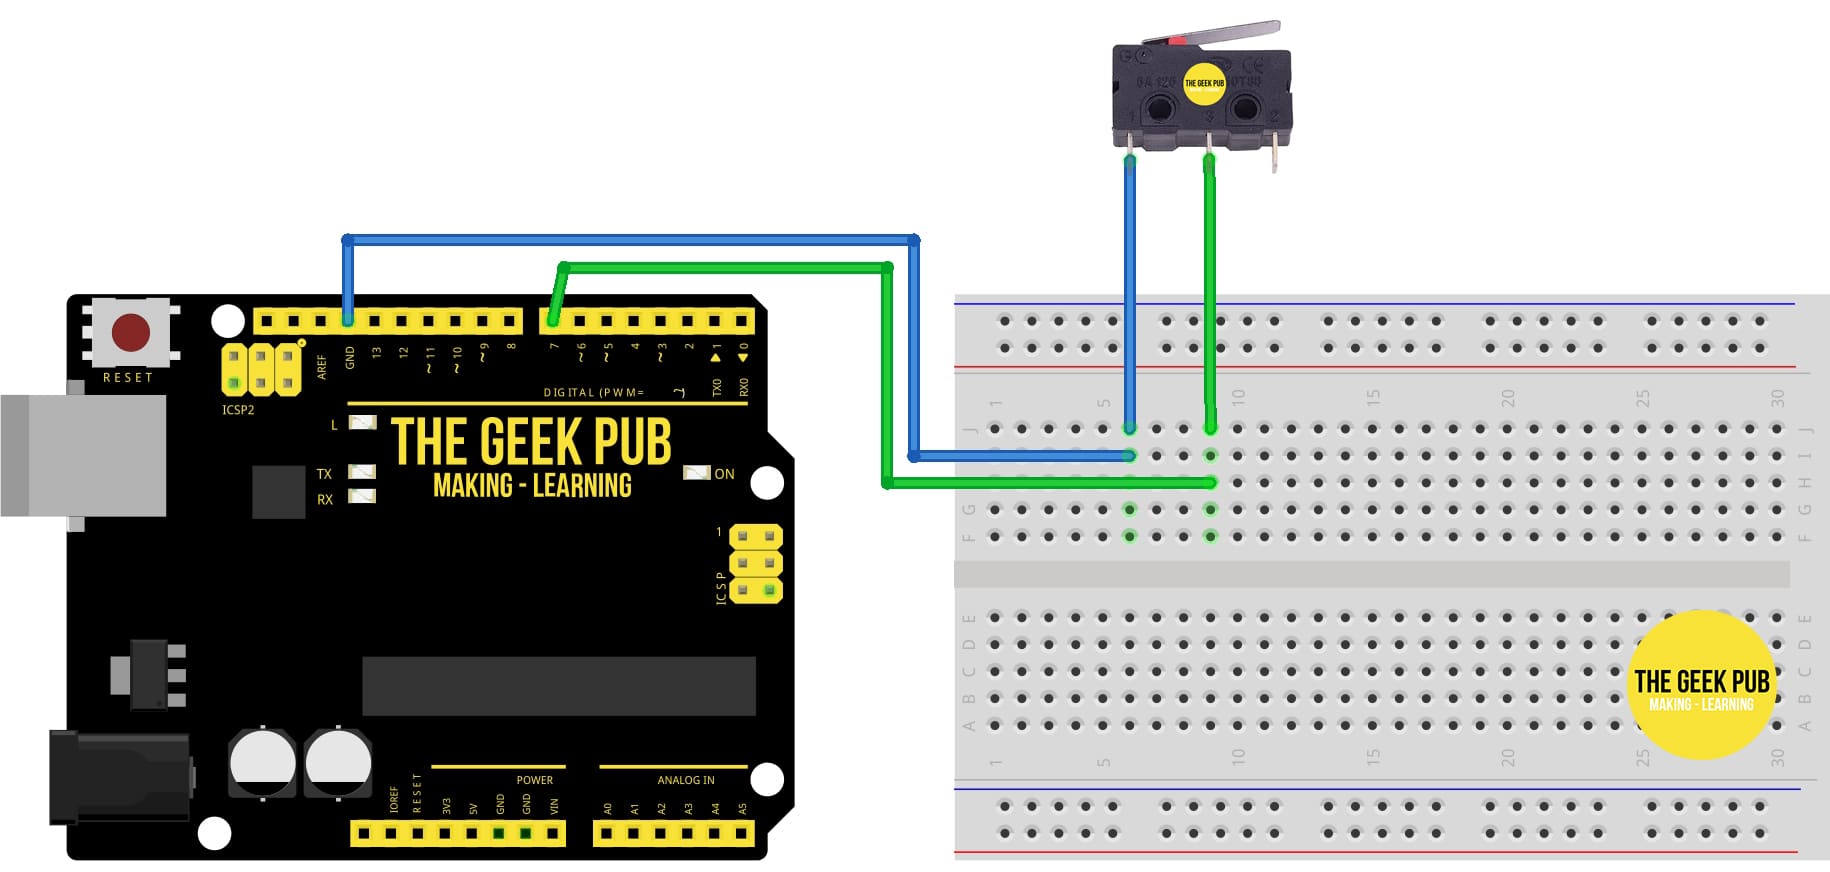
Arduino Limit Switch Tutorial The Geek Pub
Limit Switch Code Using Arduino apilloff May 3, 2017, 8:33pm 1 Can anybody help me write a sketch for a limit switch? I am using the Adafruit Motor Shield V1.0. I just need a sketch so whenever the limit is switched, FORWARD. UKHeliBob May 3, 2017, 8:49pm 2 if (digitalRead (limitSwitchPin) == LOW) { //call the function that moves forward }

DIYables Limit Switch for Arduino, ESP32, ESP8266, Raspberry Pi
Connect the Limit Switch to the Arduino UNO. Connect one pin of the limit switch to the GND pin and the other pin to a digital pin (e.g. 2) of the Arduino. In the Arduino IDE, import the necessary libraries by adding these lines at the top of your sketch: #include
DIYables Limit Switch for Arduino, ESP32, ESP8266, Raspberry Pi
1) Chase the interference and fix / shield from it 2) Stick a filter in place to negate the noise. Read on to see how easy option 2 is to get perfect end stop awareness for your Arduino based CNC machines & Printers Ask Question Step 1: Behind the Issue
Limit switch with arduino
Arduino limit switches are fundamental components that allow your projects to detect the physical limits of motion or position. They work by utilizing a simple mechanism involving a lever or button that gets pressed or released when the desired limit is reached.

Limit Switch with Arduino Working YouTube
You set your limit switch pin Lim1 as output, though to read a switch you need to configure it as input. And if you want to use a pullup resistor (in contrast to a pulldown resistor) you can activate the internal pullup in the same step: pinMode (Lim1, INPUT_PULLUP); When reading the limit switch inside the outer for loop you write.
Collision Switch Limit switch Travel Switch for Robot Arduino Raspberry
Download Programming:https://www.electroniclinic.com/arduino-uno-limit-switch-tutorial/Subscribe to my New YouTube Channel, if you want to watch my videos in.

TWTADE/TZ8108 ME8108 Adjustable Roller Lever Arm arduino Limit Switch
4 min read January 18, 2022 Arduino Uno limit switch Interfacing and Programming is the best topic for those who want to use a limit switch with Arduino Uno, Nano, or Mega. You will find a lot of articles on the internet but the unique thing about this limit switch article is I have explained everything from interfacing to the final testing.
Arduino Stepper Motor and Limit Switch Arduino Tutorial
The limit switch controlling using an Arduino Uno microcontroller (MCU) refers to the process of using an Arduino Uno microcontroller to monitor the state of a limit switch and perform specific actions based on that state.

Arduino Limit Switch Tutorial The Geek Pub
Explore the Interfacing and Programming of a Limit Switch With Arduino Uno, a Popular Microcontroller Board, Enabling You to Incorporate Limit Switches Into Your Arduino Projects for Precise Control and Automation. Basics Boards Arduino Banana Pi BeagleBone Odroid Orange Pi Raspberry Pi Tools Multimeters Oscilloscopes Soldering Tools
Limit switch with arduino
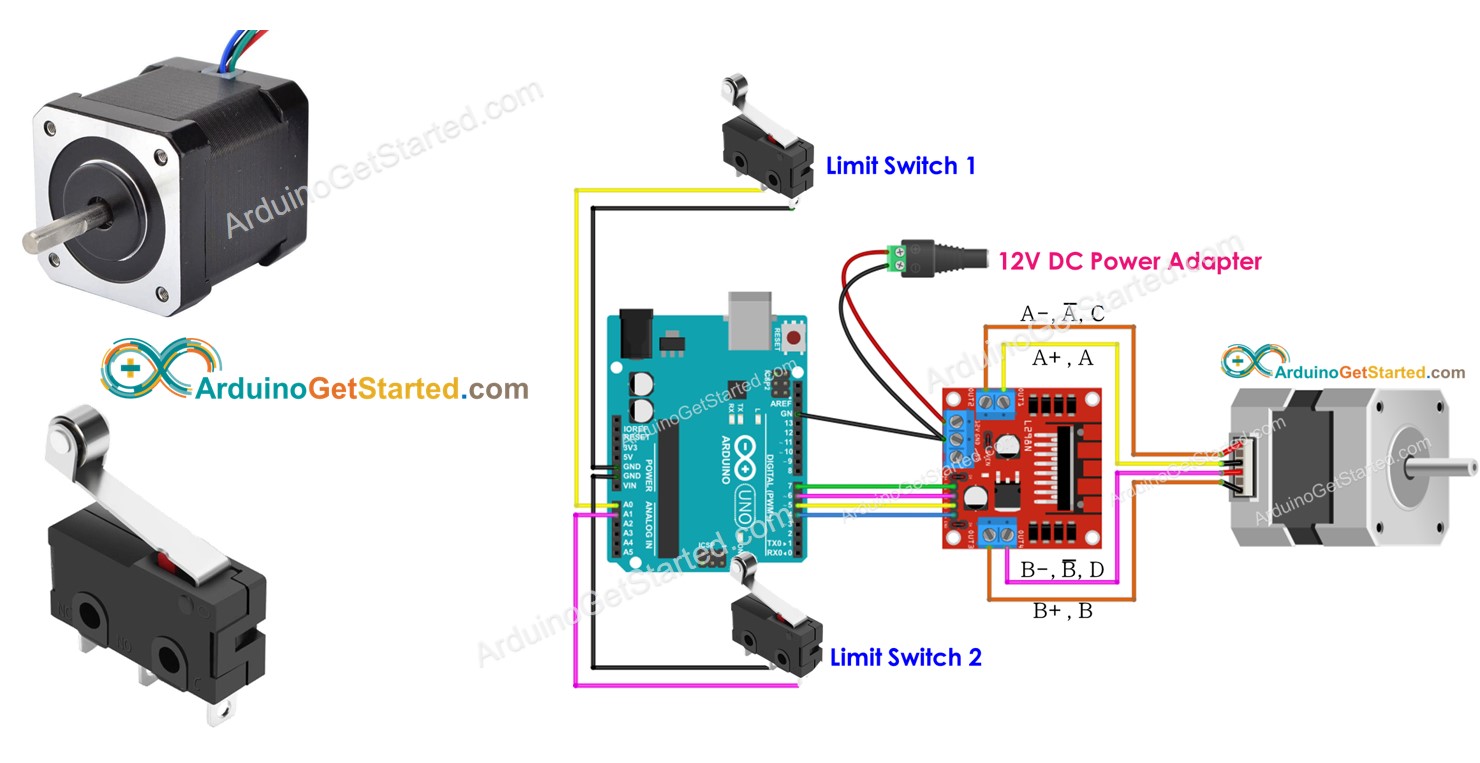
This tutorial provides the Arduino codes for two cases: One stepper motor + one limit switch, One stepper motor + two limit switches. Wiring diagram between the stepper motor and a limit switch This image is created using Fritzing. Click to enlarge image Wiring diagram between the stepper motor and two limit switches
Arduino Uno Limit Switch Interfacing and Programming
This tutorial provides the Arduino codes for two cases: One DC motor + one limit switch, One DC motor + two limit switches. Wiring diagram between the DC motor and a limit switch This image is created using Fritzing. Click to enlarge image Wiring diagram between the DC motor and two limit switches This image is created using Fritzing.
